
Views: 243 Author: Reshine-Display Publish Time: 2024-05-10 Origin: Site


Resistive touch screens have been a staple in various electronic devices for decades, offering a simple yet effective way to interact with digital content through pressure-sensitive technology. However, like any technology, resistive touch screens may encounter issues or stop working altogether due to various factors such as wear and tear, physical damage, or electronic malfunction. In this comprehensive guide, we'll walk you through the step-by-step process of replacing a resistive touch screen when it stops working, helping you troubleshoot common problems and restore functionality to your device.
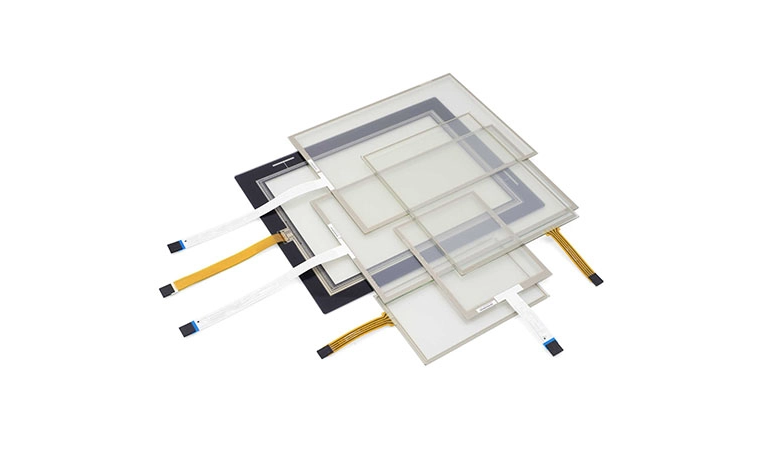
Before we delve into the replacement process, let's briefly review what resistive touch screens are and how they work. A resistive touch screen is composed of multiple layers, typically two flexible sheets or films separated by a small gap. When pressure is applied to the surface of the screen, the top layer makes contact with the bottom layer, creating a circuit and registering the touch input. Resistive touch screens are known for their durability, accuracy, and versatility, making them suitable for a wide range of applications, including smartphones, tablets, GPS devices, and industrial control panels.
Before considering replacement, it's essential to troubleshoot common issues that may be affecting the performance of your resistive touch screen. Here are some troubleshooting steps you can take:
●Clean the Screen: Over time, dirt, dust, and debris can accumulate on the surface of the touch screen, affecting its responsiveness and accuracy. Use a soft, lint-free cloth lightly dampened with water or a mild cleaning solution to gently wipe the screen and remove any buildup. Avoid using harsh chemicals or abrasive materials that may damage the screen.
●Calibrate the Screen: If the touch screen is registering inaccurate or erratic inputs, calibrating the screen settings may help improve performance. Most devices have built-in calibration tools or settings that allow you to recalibrate the touch screen to align with the display. Follow the on-screen instructions or refer to the device's user manual for guidance on calibrating the touch screen.
●Check for Physical Damage: Inspect the surface of the touch screen for any signs of physical damage, such as scratches, cracks, or dents. Physical damage can impair the functionality of the touch screen and may require professional repair or replacement. If the damage is minor, applying a screen protector or protective film may help prevent further damage and restore usability.
●Update Software: Ensure that your device's operating system and firmware are up to date, as software updates may include bug fixes and improvements that address touch screen issues. Check for available updates in the device settings or through the manufacturer's website, and follow the instructions to install the latest software version.
If troubleshooting steps fail to resolve the issue and the resistive touch screen remains unresponsive or malfunctioning, replacing the screen may be necessary. Here's a step-by-step guide to replacing a resistive touch screen:
●Gather Tools and Materials: Before starting the replacement process, gather the necessary tools and materials, including a replacement resistive touch screen, screwdriver set, adhesive tape or glue, and any other accessories or components required for your specific device.
vPower Off the Device: Ensure that the device is powered off and disconnected from any power sources before beginning the replacement process. This will prevent electrical shock and reduce the risk of damage to internal components during the replacement.
●Disassemble the Device: Carefully disassemble the device housing or casing to access the internal components, including the defective touch screen. Use a screwdriver set or other tools as needed to remove screws, clips, or adhesive seals holding the device together. Take note of the disassembly process and keep track of any components or cables that need to be removed or disconnected.
●Remove the Defective Touch Screen: Once you have access to the touch screen assembly, carefully remove the defective touch screen from its mounting position. Disconnect any cables or connectors attached to the touch screen, taking care not to damage the delicate ribbon cables or connectors.
●Install the Replacement Touch Screen: Position the replacement resistive touch screen in the mounting location, ensuring that it aligns properly with the display and any mounting brackets or adhesive pads. Carefully reconnect any cables or connectors to the new touch screen, following the same orientation and configuration as the original screen.
●Reassemble the Device: Once the replacement touch screen is installed and connected, reassemble the device housing or casing in the reverse order of disassembly. Secure any screws, clips, or adhesive seals as needed to ensure a secure and stable assembly. Take care not to pinch or damage any cables or components during reassembly.
●Test the Touch Screen: Power on the device and test the functionality of the replacement touch screen to ensure that it responds accurately to touch inputs and registers correctly with the display. Perform a calibration if necessary to fine-tune the sensitivity and accuracy of the touch screen.
●Finalize Installation: Once the replacement touch screen is tested and confirmed to be working correctly, finalize the installation by securing any remaining components or covers and ensuring that all connections are secure. Clean the surface of the touch screen with a soft cloth to remove any fingerprints or smudges, and apply a screen protector or protective film if desired to prevent future damage.
In conclusion, replacing a resistive touch screen when it stops working requires careful troubleshooting, preparation, and execution to ensure a successful outcome. By following the step-by-step guide outlined in this comprehensive guide and taking appropriate precautions, you can effectively replace a defective touch screen and restore functionality to your device. Whether it's a smartphone, tablet, GPS device, or industrial control panel, understanding the process of replacing a resistive touch screen empowers you to troubleshoot and resolve touch screen issues with confidence.


